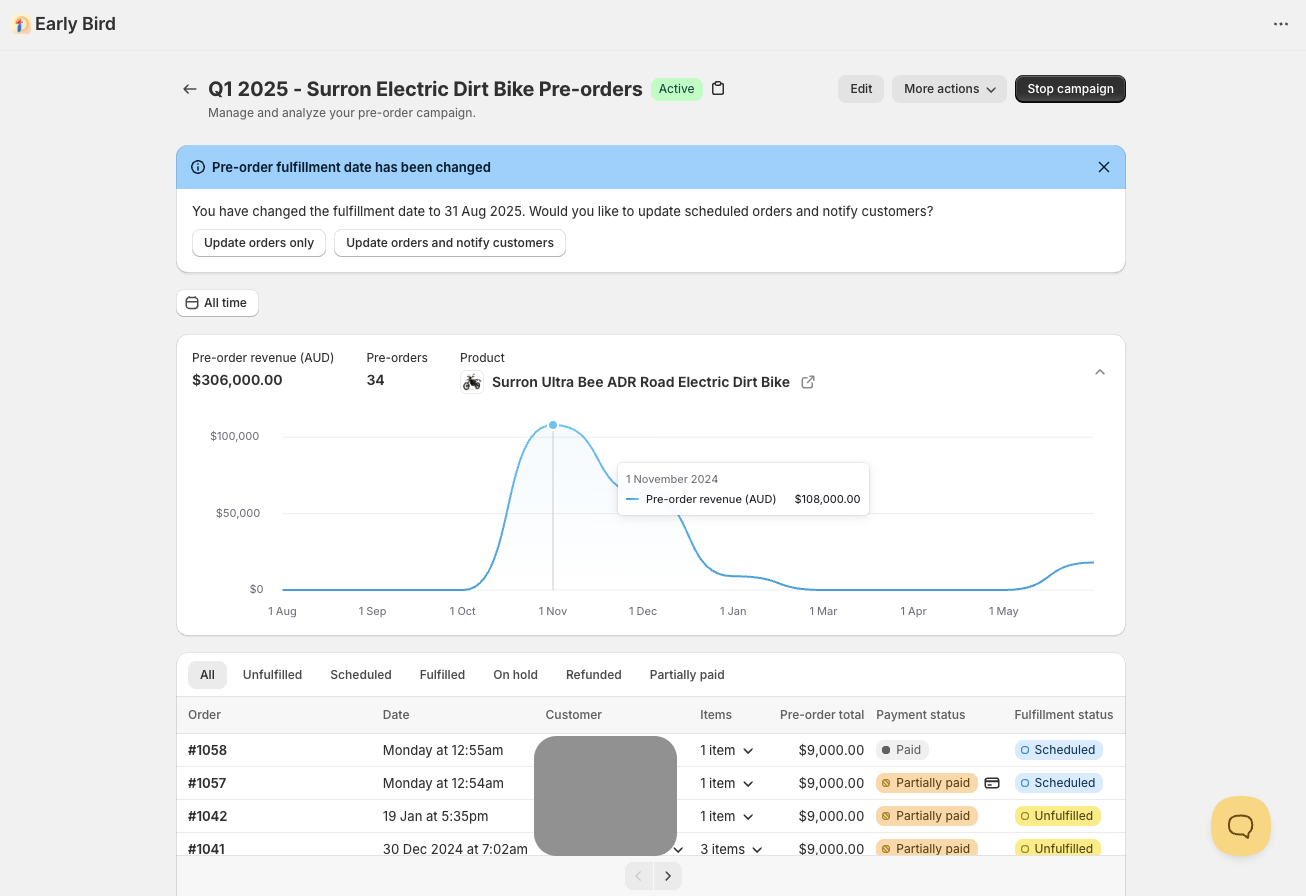
Welcome to Part 2 of How to set up a Waitlist & Coming Soon Pre-order campaign on Shopify. In Part 1, we went through all the aspects that you need to plan for your campaign. If you haven't read it yet, I highly recommend you check out our Part 1 article first before reading on (you can watch our YouTube video too, if you prefer).
In this Part 2 article, you'll learn how to set up a waitlist and pre-orders by yourself without a third party app, with minimal coding required. (Technically it’s not really coding, it’s just adding a few lines of text to your theme code.)
You can watch our video version of this article, if you prefer:
Let's get started.
I'm sure you already know how to set up a new product on Shopify, but when you're creating one for a Coming Soon product, there are some details that might just take it from a 7 out of 10 to a 10 out of 10 pre-order customer experience.
Many merchants would often add the word Pre-order in the product name, so it's impossible for customers to miss it. Some would also add "Limited edition" or "Founder's edition" as part of the product name as well to drive scarcity.

For your product description, make sure you:
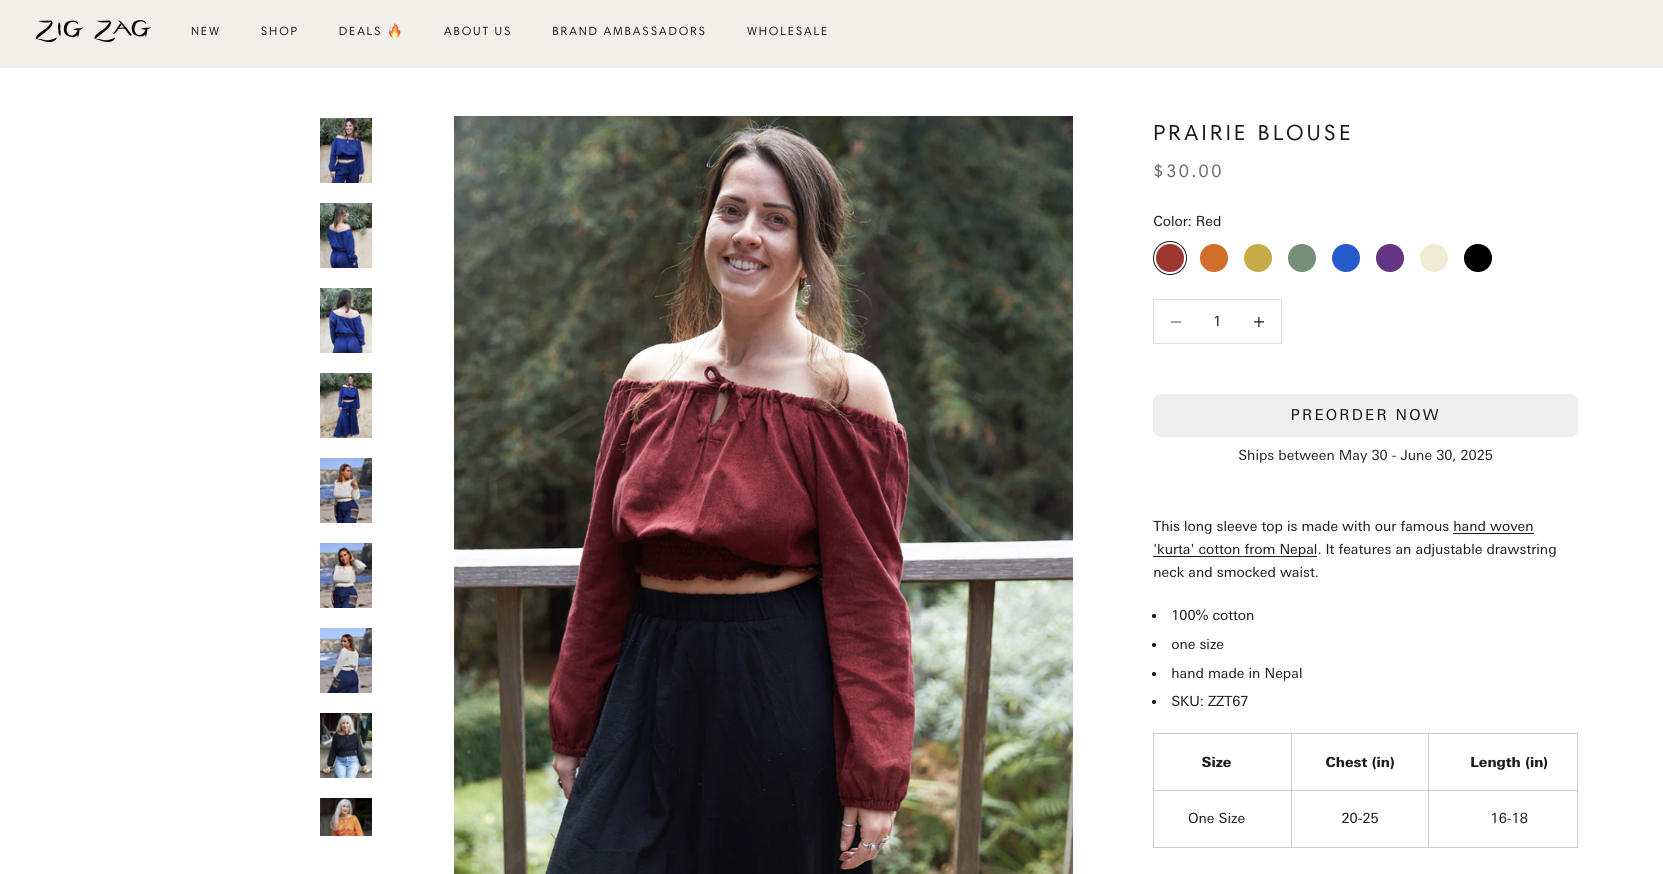
[COMING SOON - Ships between 15th - 25th August 2025]
Pre-order now to reserve your [Product Name] and get priority shipping.
[Product description and features]
Why preorder?
- [Benefit 1 - Limited edition design]
- [Benefit 2 - Early Bird pre-order pricing]
- [Benefit 3 - Secure your limited edition before it sells out]
We’ll keep you updated about the shipping progress through our newsletter and on our Instagram page.
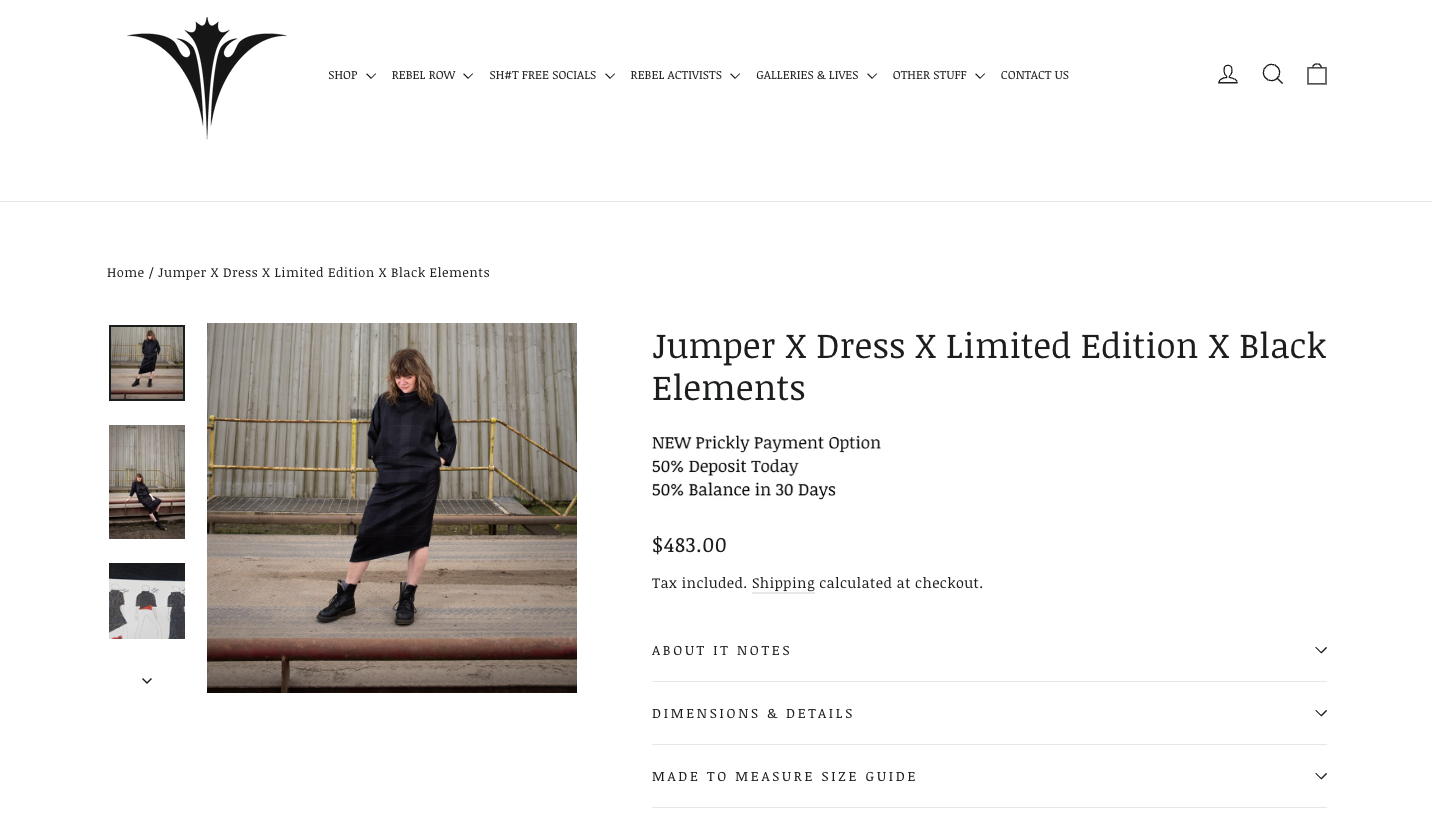
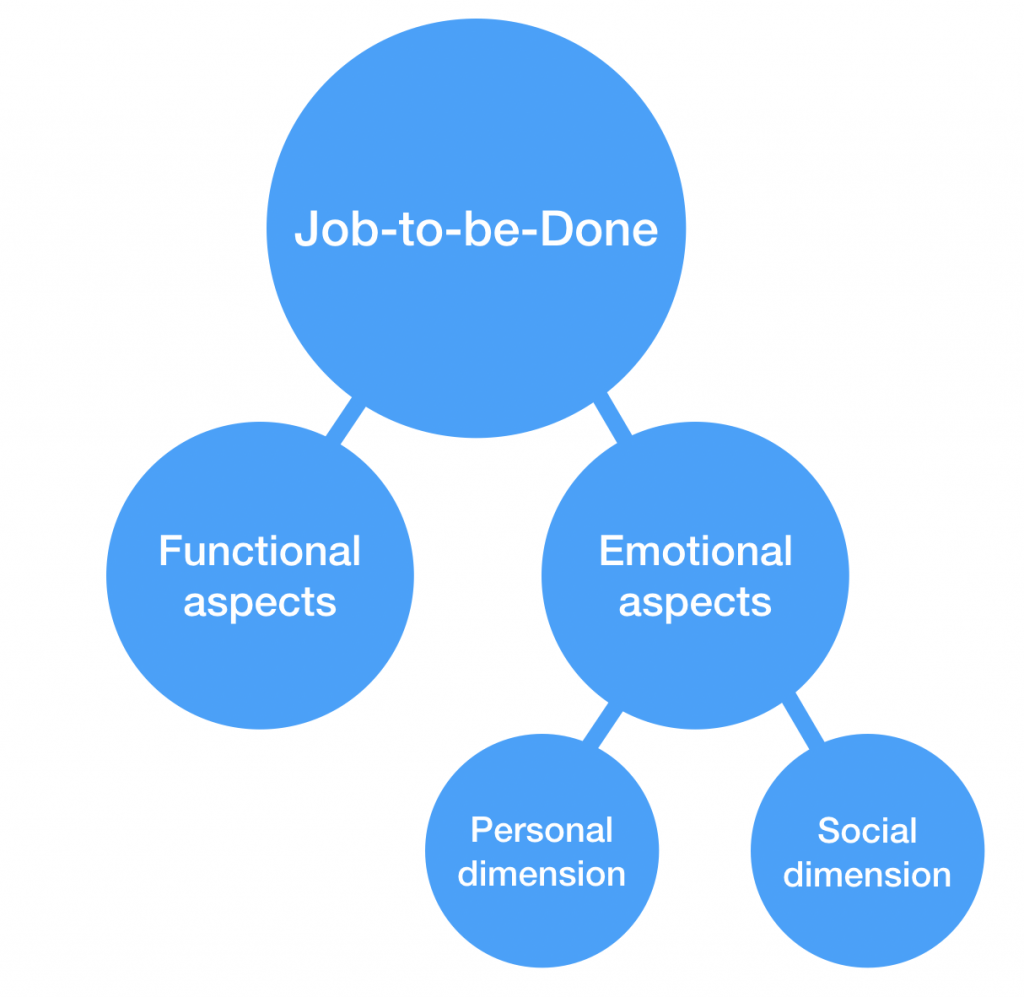
Besides sharing your founder's journey and the story behind your product, tie it back to how it relates to your customers' Jobs-to-be-done. You can refer to my Part 1 YouTube video where I share examples of Jobs-to-be-done at the 17:35 minute mark.
For your product images, since it's for a pre-order and you likely won't have the actual stock yet, you can let customers know your current photos are just samples.
You might want to consider:
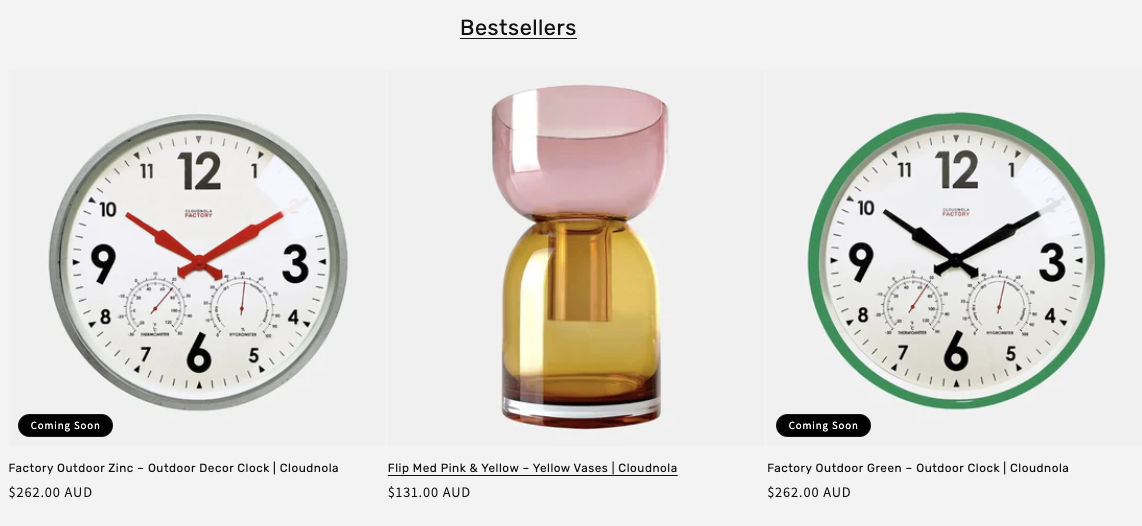
If you're offering a pre-order discount and you're not using an app, you can just use Shopify's compare-at-price function, which puts a strikethrough of the full price on your product page. It'll then show the discounted price besides the original full price. You might want to mention when this early bird pricing will end as well.

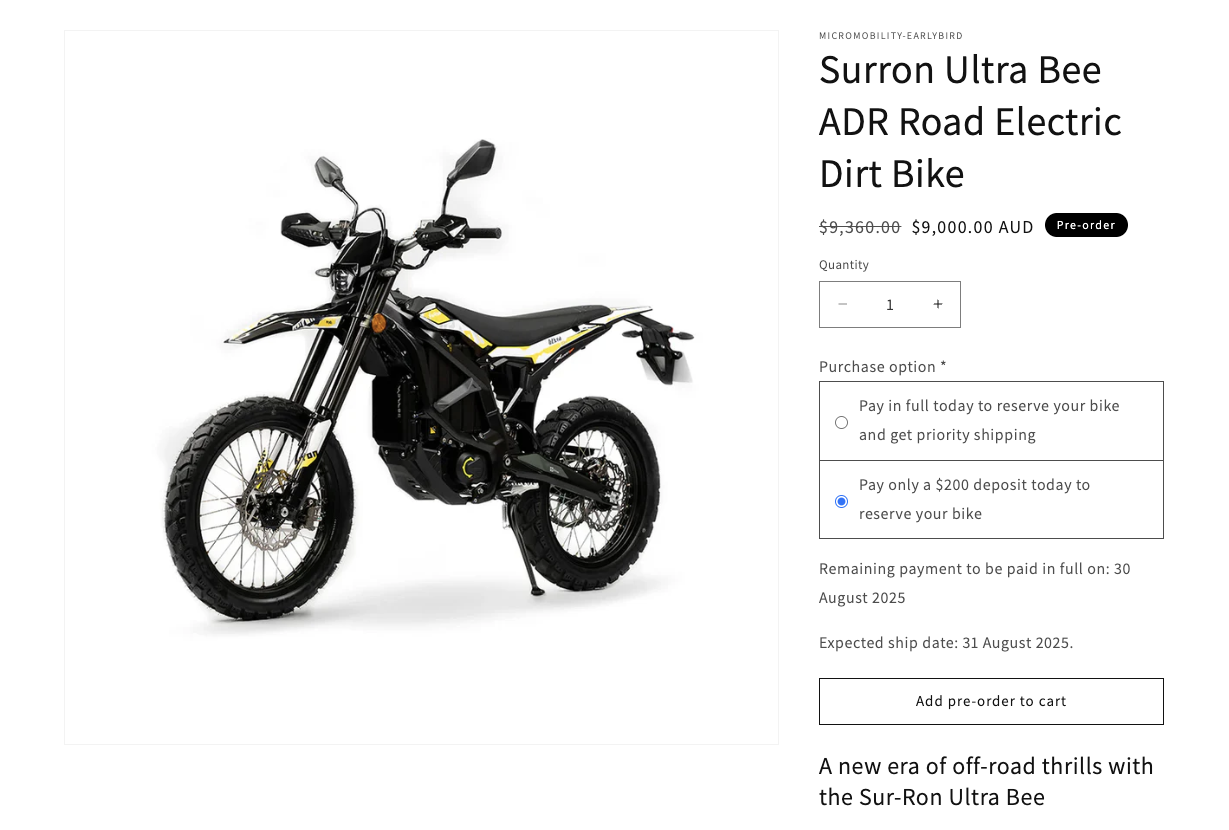
Otherwise if you're using an app, some apps like ours have a separate discount function designed solely for pre-orders.

I'm not a huge fan of discounting, because it cheapens your brand and your efforts. So if you have a strong brand and product demand, I recommend you capture pre-order payments in full upfront, and avoid offering discounts so you can shorten your cash conversion cycle and keep good margins for your business.
Now that we've set up the product, we need to adjust the inventory settings.
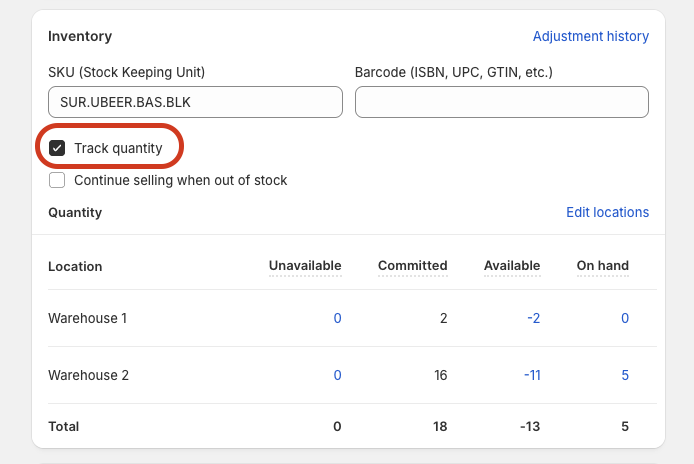
Make sure you've enabled the Track quantity option. For now, set your quantity to 0, BUT don't enable the "Continue selling when out of stock" option yet.
This is because we don't want customers to be able to purchase anything during the waitlist sign-up phase. We'll tick this box later when we're ready to open pre-orders.
After you've done that, let's make it easy for you and your team to find your pre-order products:
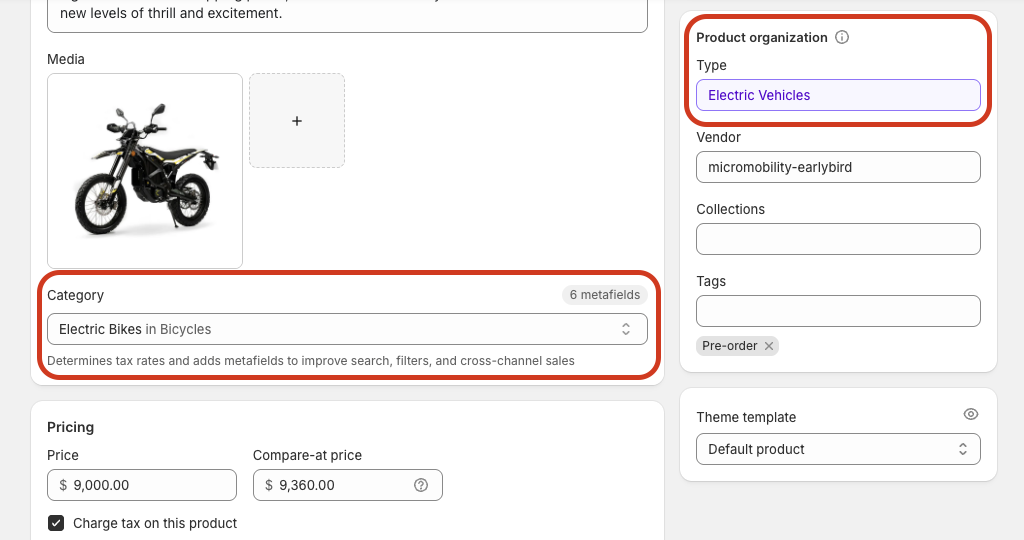
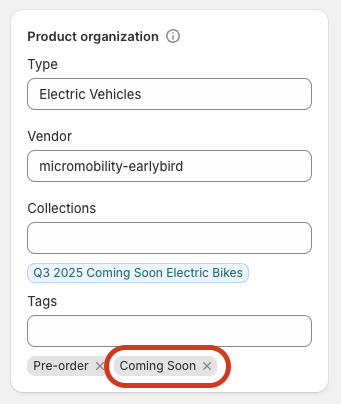
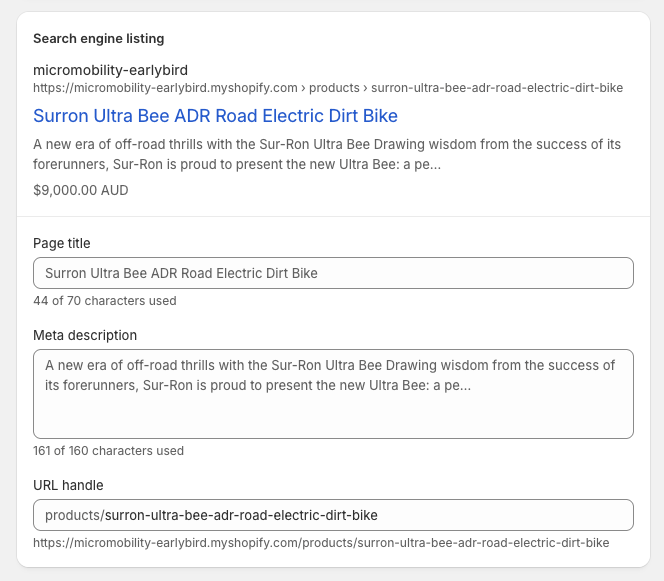
Don't forget to configure your shipping details and enter the SEO info. You can leave the product status to "Draft" for now since we'd still have to prepare for our waitlist side of things.
Sales channels - this is to configure where your product appears beyond your website.
Many Shopify merchants aren't aware of this, but when you run pre-orders or backorders (both of which means you're selling something that's not in stock yet), Shopify won't display the inventory status outside of your website.
Your products' inventory status will not be displayed on Meta & IG Shop, Google Shopping, TikTok Shop, The Shop App, and POS (Point of Sale). Your preorder products will be displayed as if they're in stock.
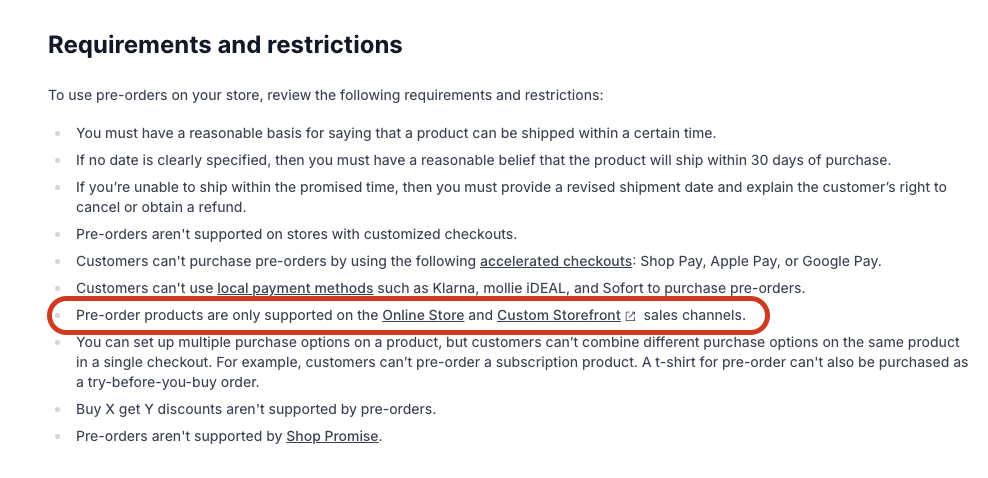
If you use a pre-order app, some might help you automatically untick all these sales channels other than online store and custom storefront which supports pre-orders, otherwise keep this in mind to do it manually yourself.
You can always re-tick the box and still display them on those sales channels, but be aware your customers will think they're purchasing something that's currently in stock.
The key here is transparency. If you provide this clarity, then you'll be offering a good pre-order customer experience!
Now that we've set up your product, let's go through a few ways to setup your waitlist. These won't require coding or a third party app.
(Please keep in mind I'm not a web designer, so I'm just sharing the steps how to capture email sign-ups, not so much about how to make it pretty...)
The Contact Form is a Shopify built-in feature, super simple, doesn't require coding. If you're not fussy about how the page looks and you need to capture emails ASAP, you can literally go to your theme editor right now, duplicate your current product page template, then add a contact form and apply this template to the product you want to create a waitlist for.

But before you go to the Theme Editor, make sure you've saved a backup of your current theme (and by backup I mean duplicate or download theme file), it's good practice to have a copy of your store design in case anything goes wrong during updates or customisations.

Besides using a contact form on a product page, you can also create a dedicated waitlist page:
1. Go to Online Store > Pages > Add page
2. Title it "Join the Waitlist" or something similar
3. On the right hand side, select "contact" from the Theme template dropdown
4. In the page content area, write about:
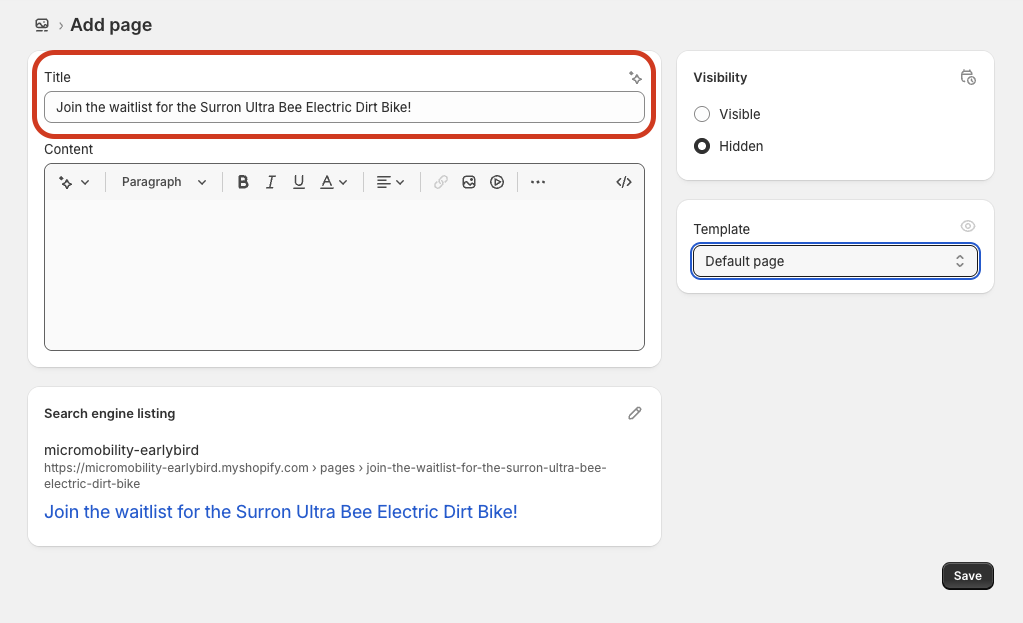
If you want to add more sections or move around the layout, you simply create a new template first in the Theme Editor under Pages > Create template. Edit what you need, then you apply this new template to your page back in the Online Store > Pages section.
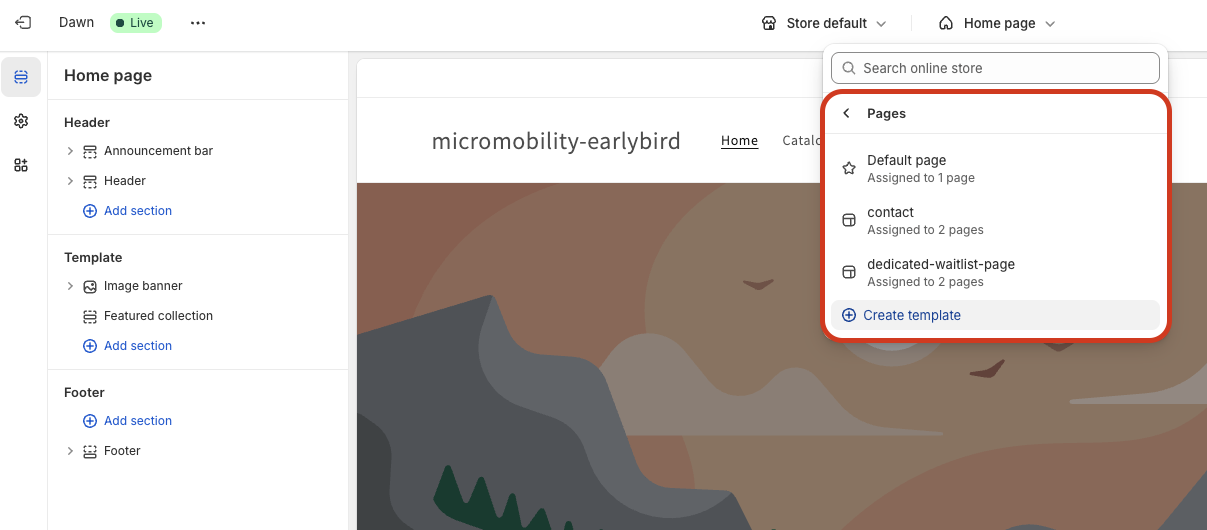
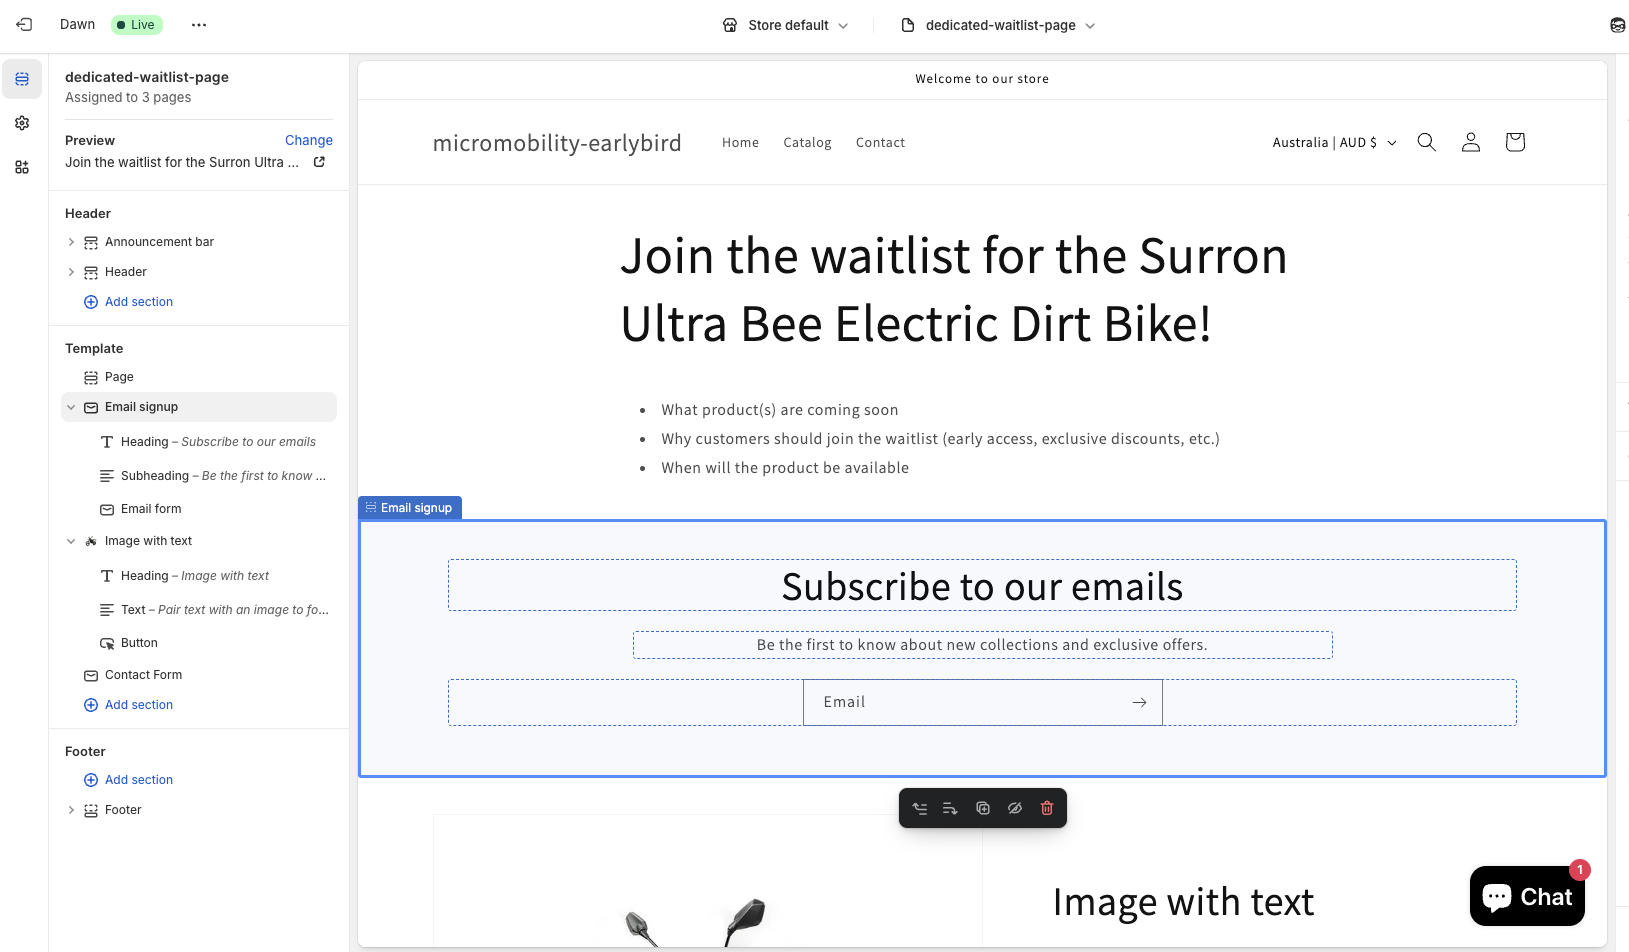
Now you might ask, "what about the email signup" block? The contact form sends submissions to your store email, while the email sign-up adds customers to your email marketing list. The contact form gives you more information but requires a bit more manual work, while the email signup is simpler but only captures email addresses.
Both options work well as a basic waitlist workaround without needing any apps or coding, so it's entirely up to you.
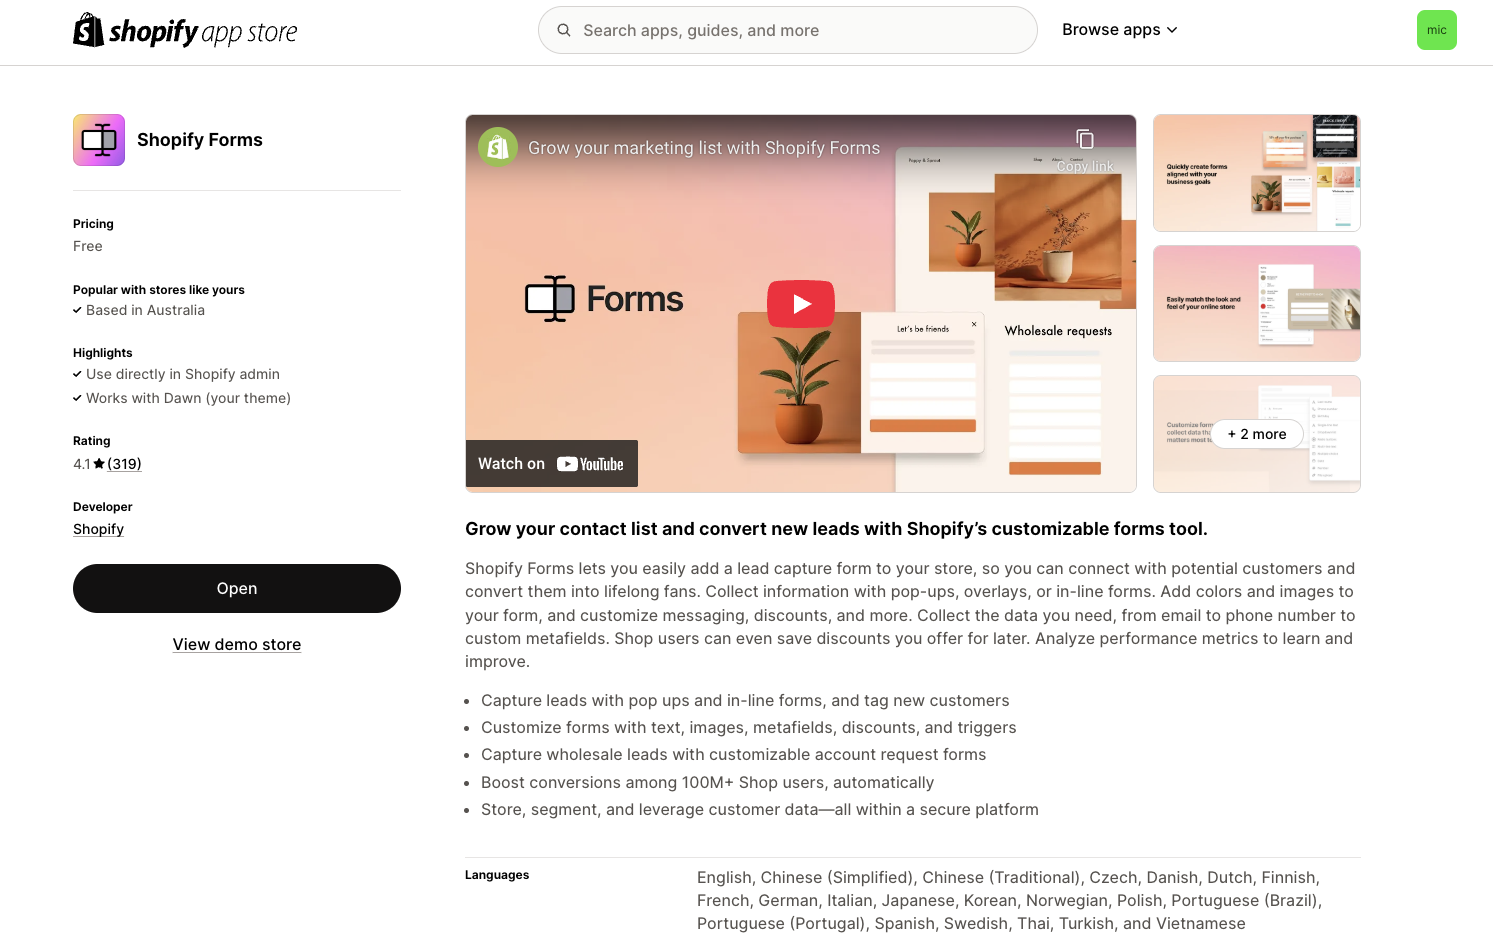
Besides using Shopify's built-in contact form or email signup, the Shopify Forms app is also a good way to create your waitlist. It's free, and even though it might not be as advanced as dedicated third party apps (which some apps like ours do have free plans anyway), it'd still be better than basic contact forms and easy for you to setup.

With the Shopify Forms app, you get more advanced features than just the built-in Contact Form or Email sign-up block, like creating both popup and inline forms, collect more types of customer info and data relevant to your upcoming launch.
You can also view analytics on form submissions and create customer segments based on the data collected.
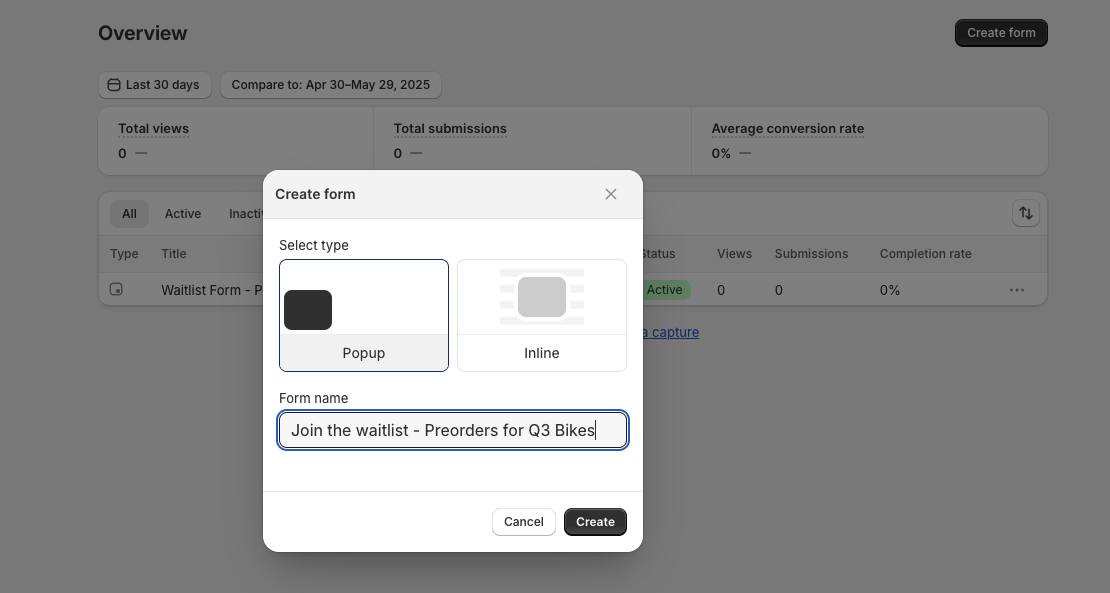
After you've installed the Shopify Forms app, create a form and choose between the pop-up or inline formats. Personally I think while pop-up has the maximum visibility, customers might mistake it as a newsletter signup, personally I'd go with the inline format. Let's name it "Join the waitlist - Pre-orders".
Then you can add fields for:

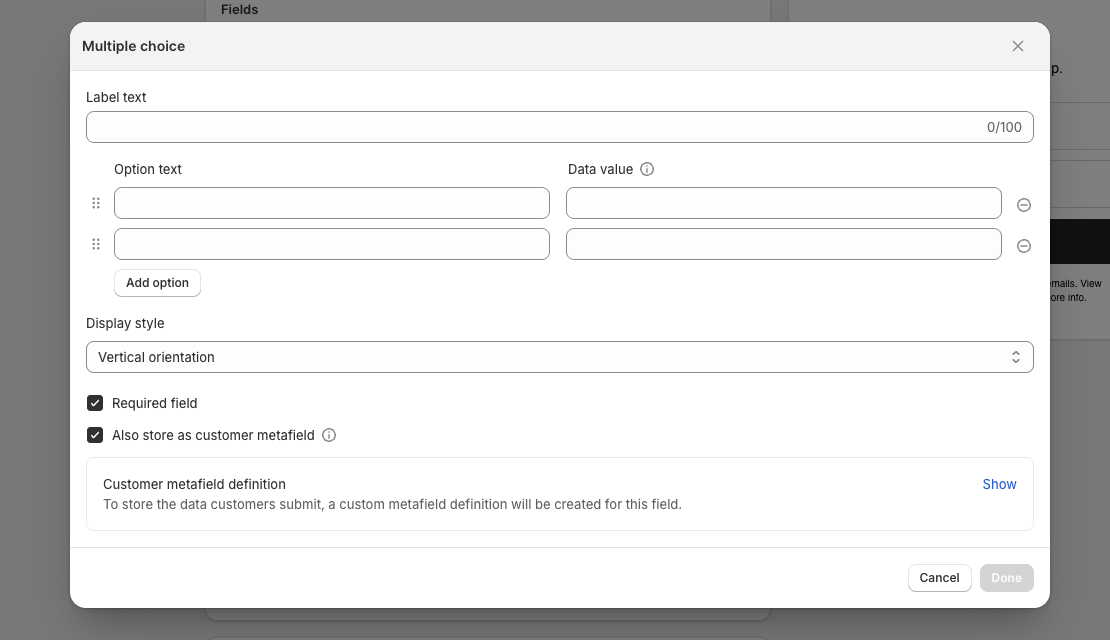
There are some other settings like consent disclaimer, customer tags, what happens after the form submission etc. that you can setup as well.
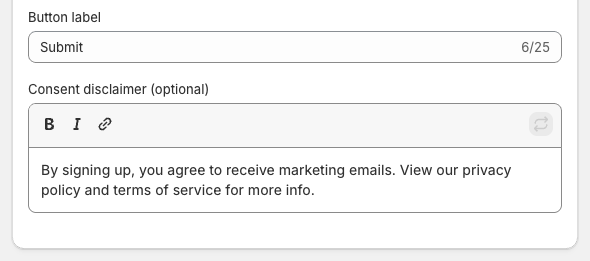
The most important one would be creating an automatic response to thank people for joining your waitlist.

This method is super simple, no coding skills required, but still has a good balance between functionality and simplicity.
Once you've captured your waitlist sign-ups and you're ready to open up pre-orders, let's set it up using only Shopify's built-in features - no apps, no coding required.
When you eventually scale up or if you need advanced pre-order features, that's when you can use a pre-order app like ours, Early Bird.
The simplest way to signal that this is a pre-order is to change your "Add to Cart" button. Similar to what we've done for the waitlist, we only want to change the "Add to Cart" button text to "Preorder" for specific products only.
Depending on your theme, some have a direct setting to customise the button text, and if they don't, try look for "Language" or "Theme language" settings where you can edit text elements.
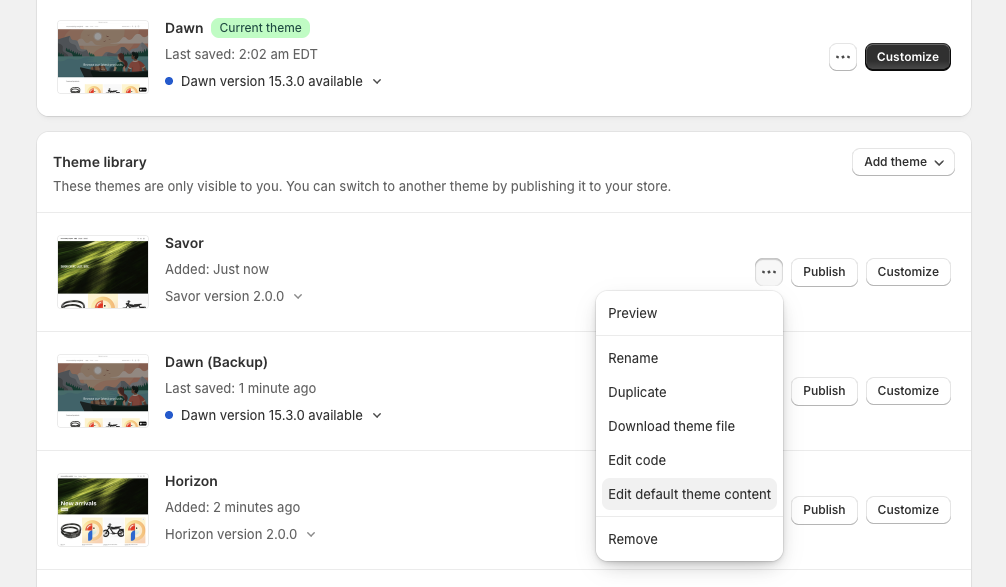
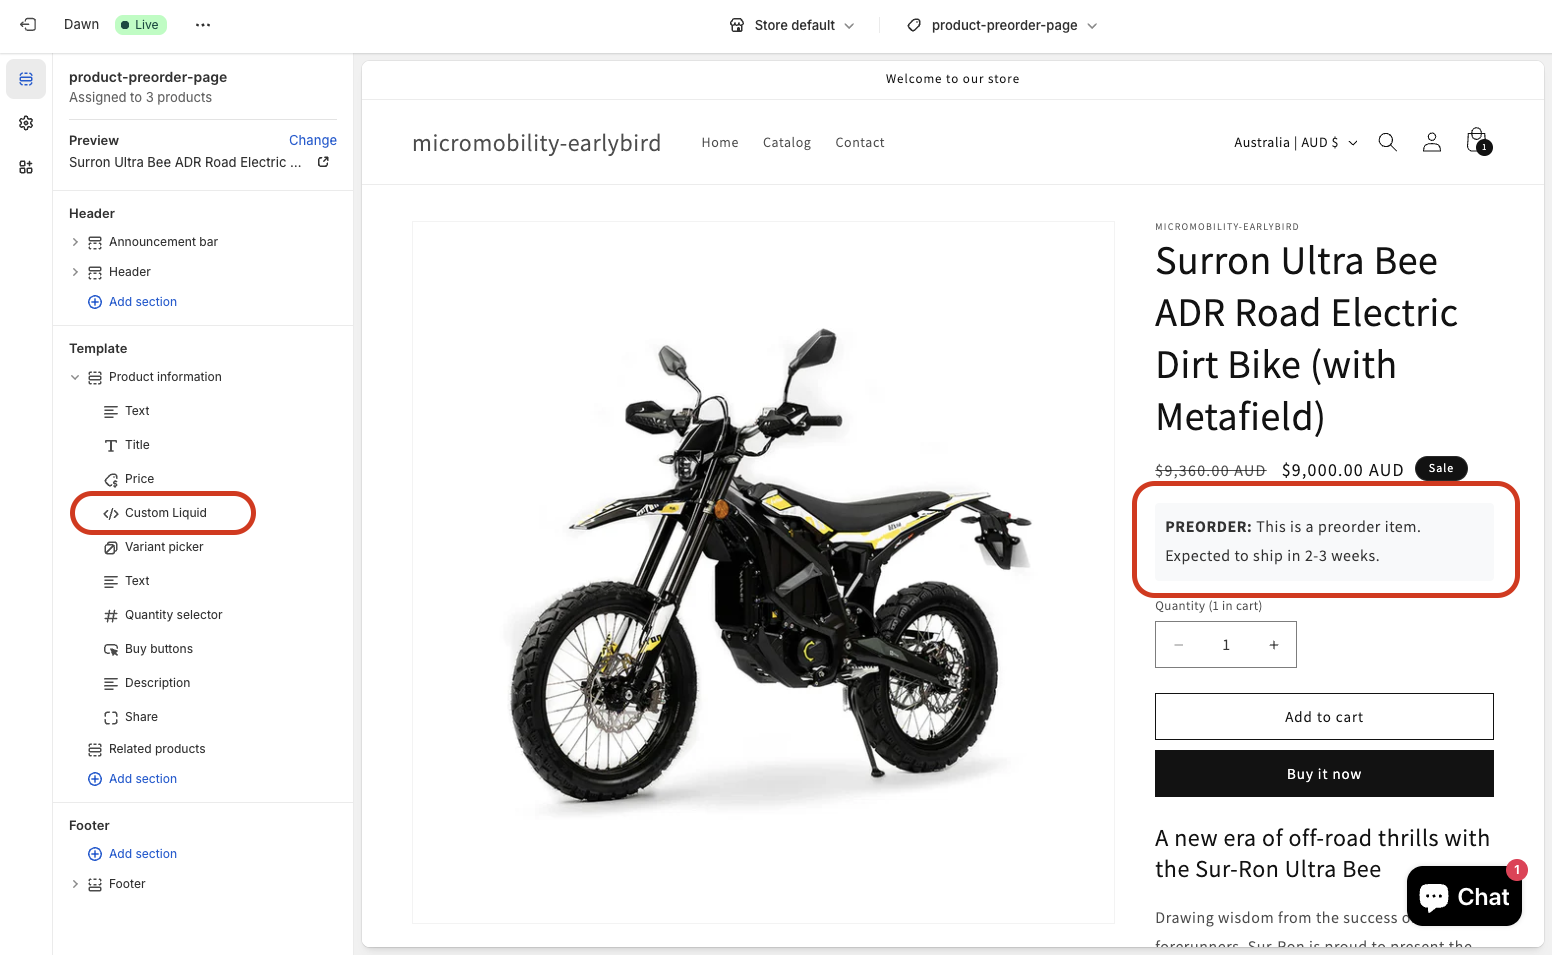
And if you still can't find a way to edit the Add to Cart button text, (e.g.the Dawn theme doesn't have this option), you can use product metafields to indicate the product is a preorder.
It'll just require copy and pasting some liquid code - still a clean approach. I'm not a software developer but I also managed to do it for this blog article, so you definitely can too.

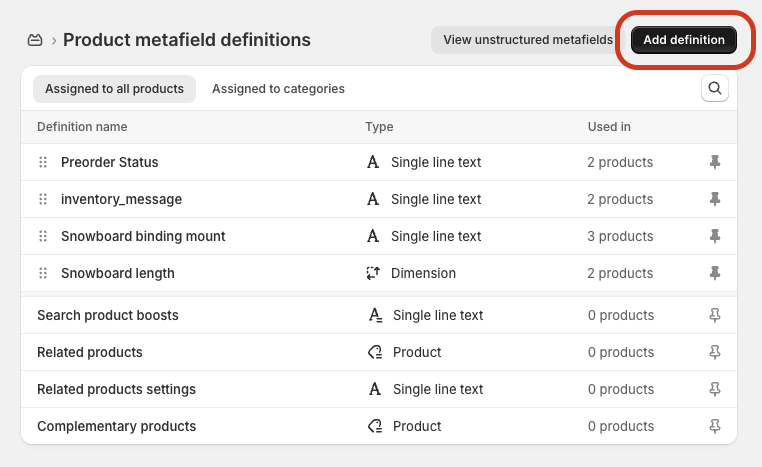

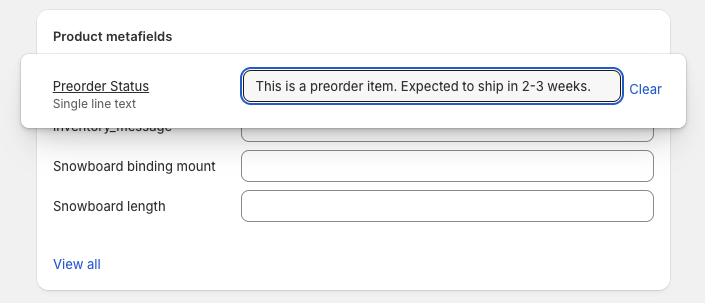
{% if product.metafields.custom.preorder_status %}
<div class="preorder-notice" style="margin-bottom: 15px; padding: 10px; background-color: #f8f9fa; border-radius: 4px; color: #333;">
<strong>PREORDER:</strong> {{ product.metafields.custom.preorder_status }}
</div>
{% endif %}
After all this, now you can indicate to customers it's a pre-order, you can keep your regular add to cart button functionality, but also easily update the pre-order info for different products!
During your waitlist phase, we didn't enable the "Continue selling when out of stock" option to avoid customers placing a purchase. Now it's time to capture sales.
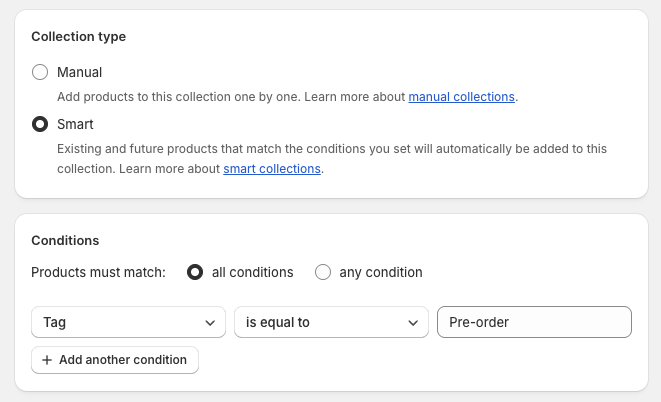
There are two ways to do this.
If you're going with Option 2, you'd need to untick the "Continue selling when out of stock" option to avoid overselling your limited pre-order quantities.


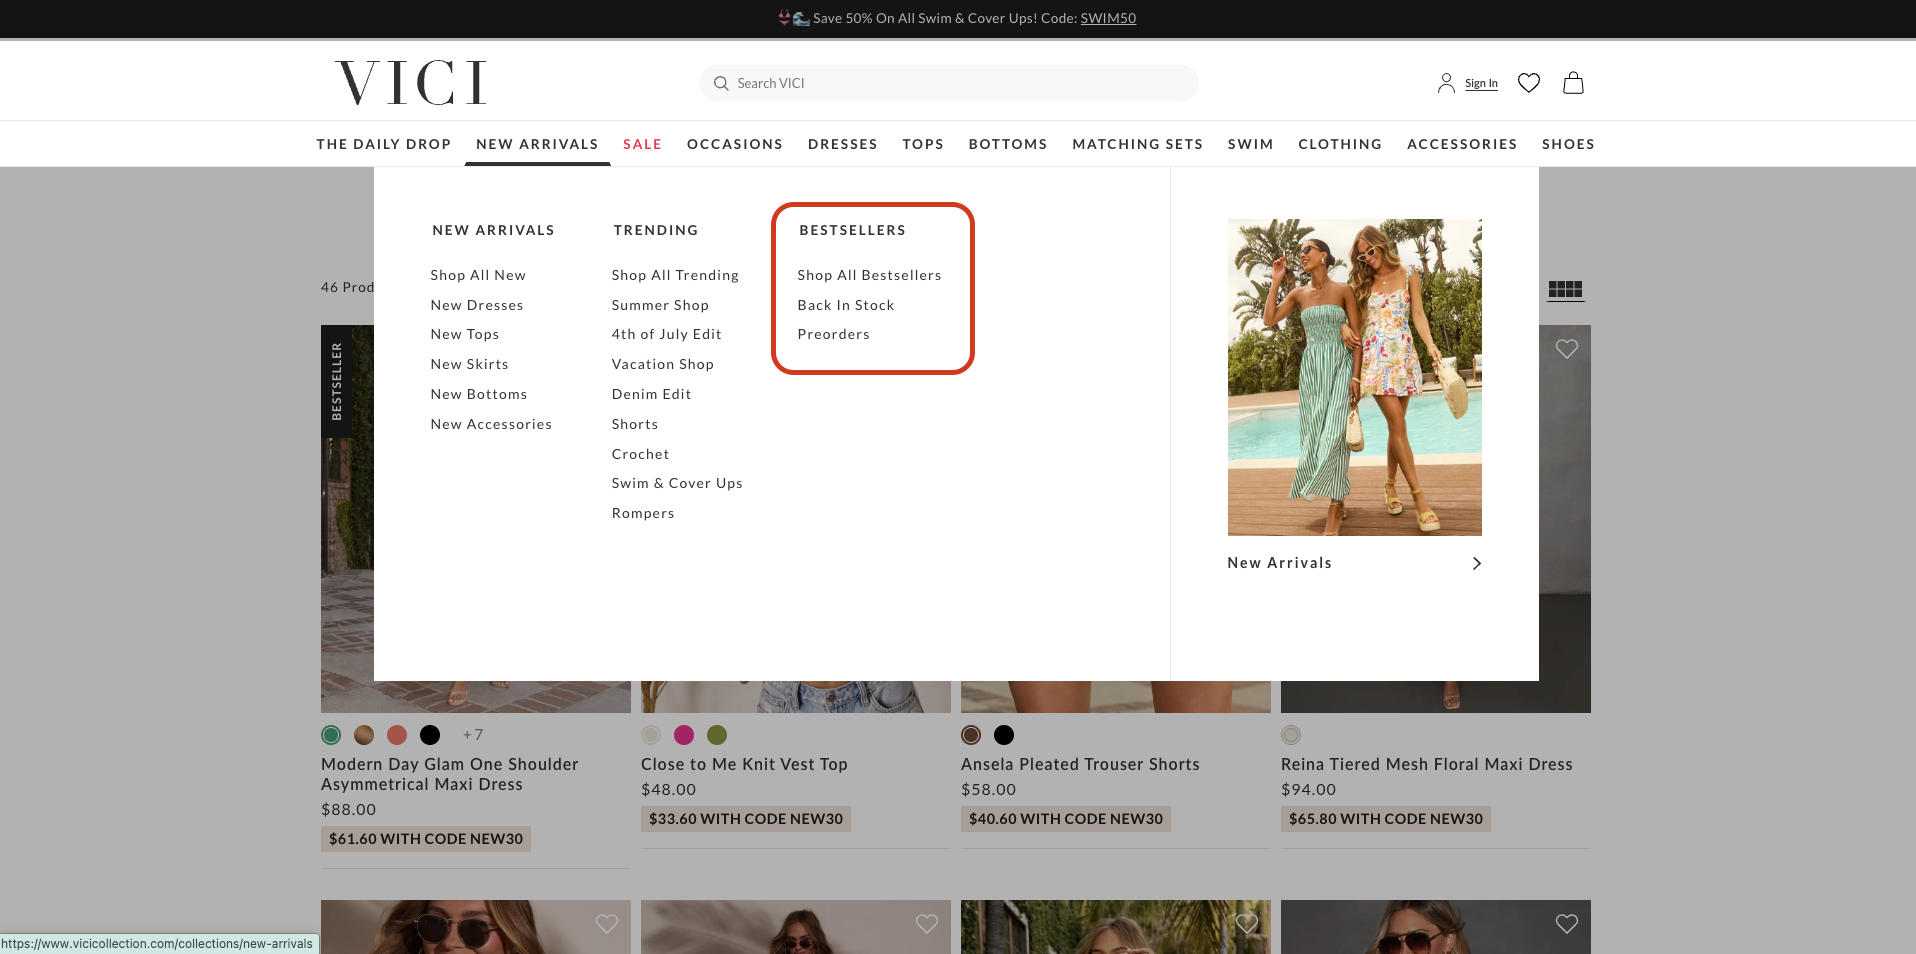

I'm sure many of you already have a store-wide announcement banner for announcing sales, promos or shipping delays. Most themes have an "Announcement bar" in the theme customizer, so you can easily add text like "🚀 New preorders available - Ships August 2025" that links to your pre-order collection.


Alright, we're finally wrapping this up. The last bit we need to do, is to create a few pages to document your pre-order info, in case your customers have questions about their pre-orders and want to find answers before reaching out to you.
This page answers when items ship, cancellation policy, what happens if there are delays etc. I haven't written a template for this yet, but when I've done so, I'll update this blog article and link to it.
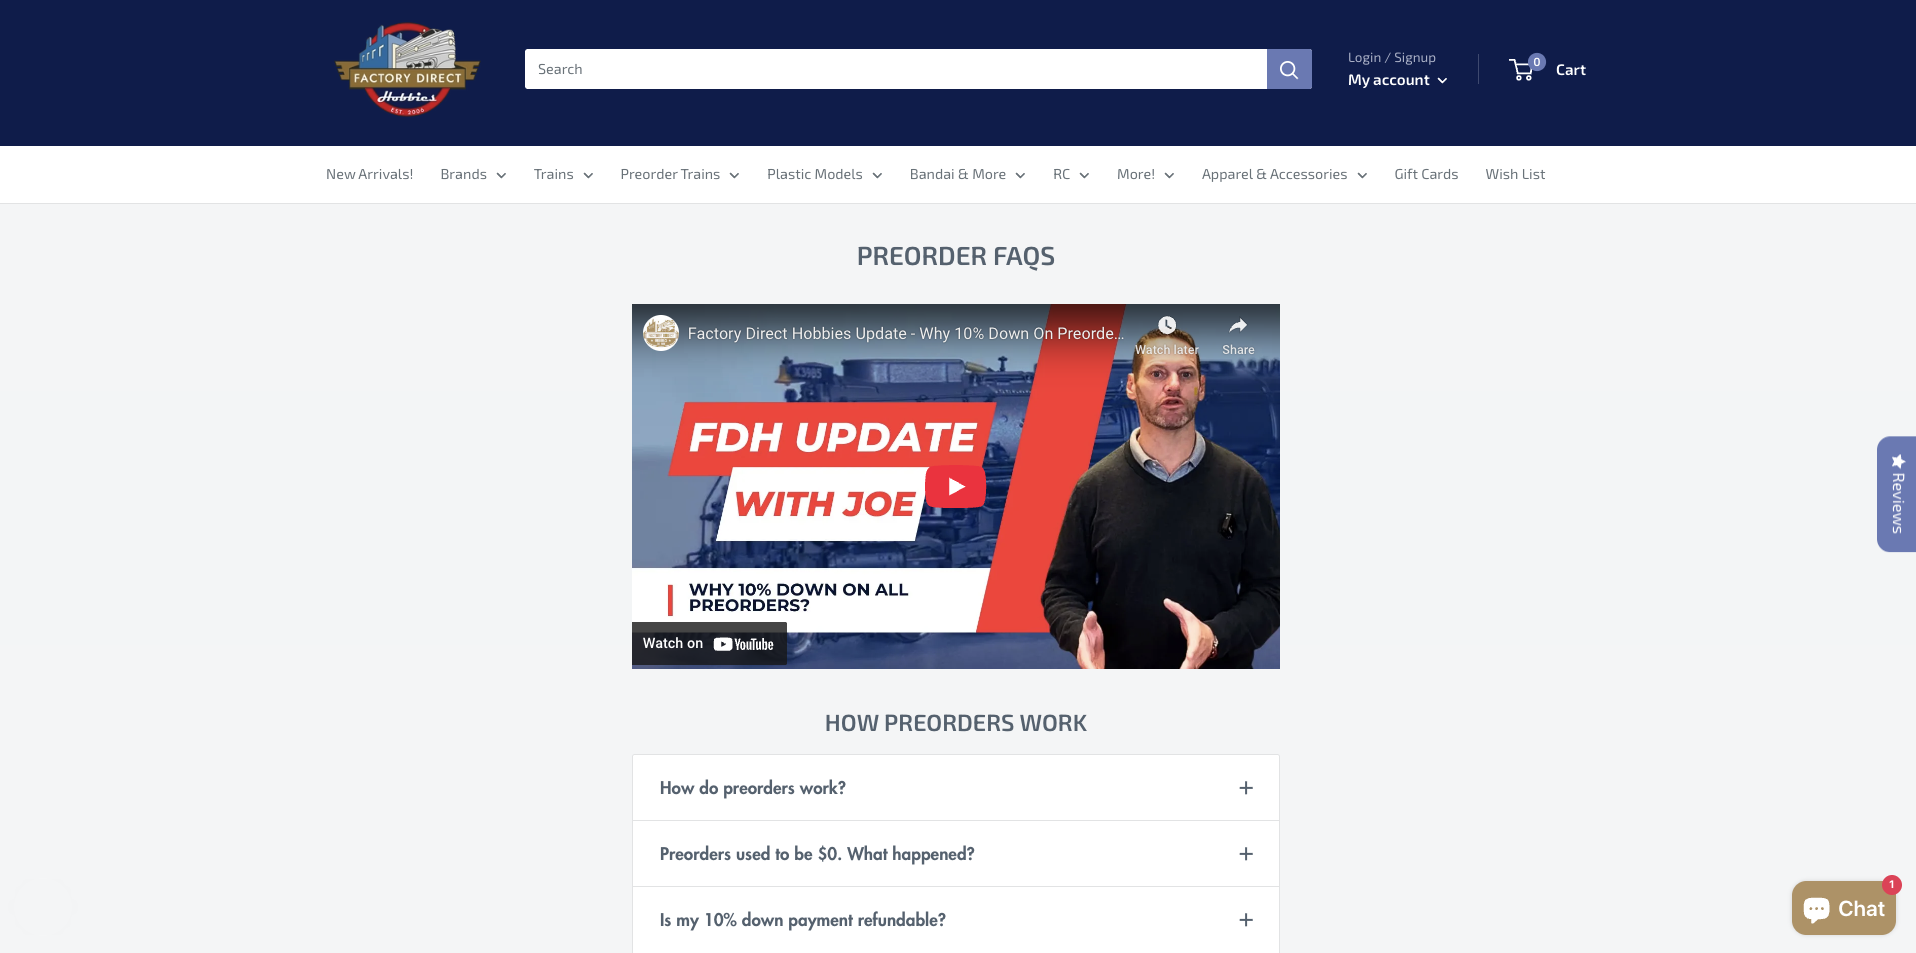
This page lists the terms and conditions for your pre-orders. Check out our free Shopify pre-order policy templates for US, EU and AU here. We have another article How to create a clear Shopify pre-order policy as well.
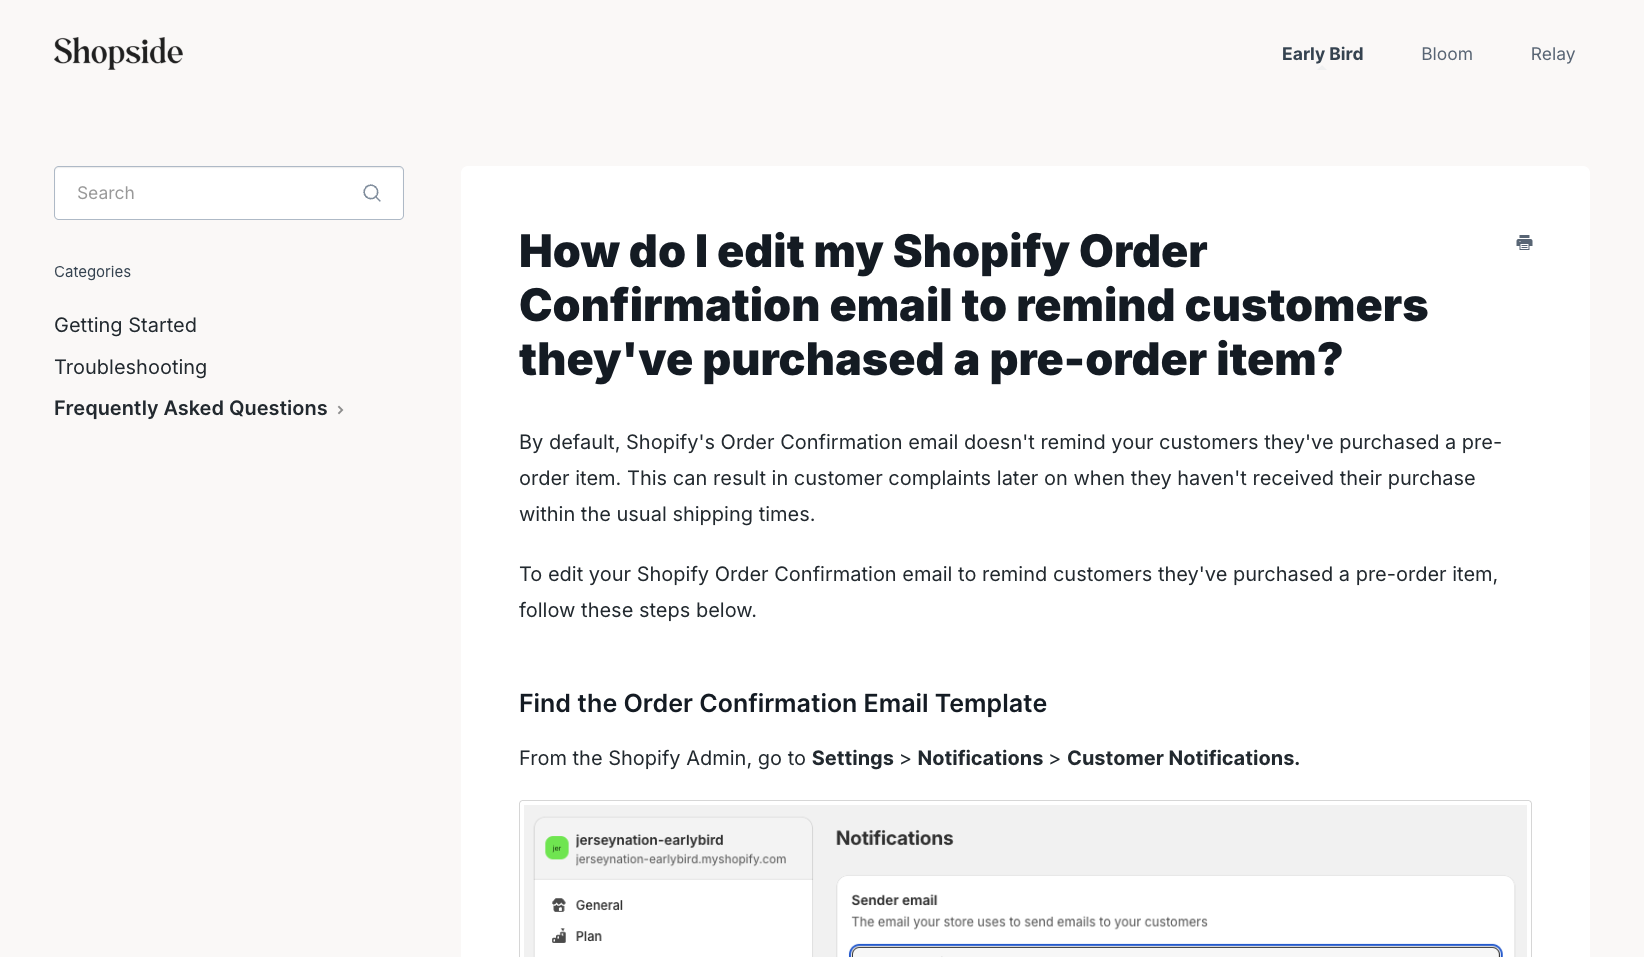
We usually recommend our merchants to (at least) edit the order confirmation emails to remind customers if they've purchased a pre-order item, when they'll receive shipping updates.

We've just gone through the manual process to set up a Waitlist & Coming Soon Pre-order campaign, WITHOUT an app.
If you're just starting out, only selling 1-2 preorder products, and you plan to ship within 30 days, this manual approach is totally fine.
Have a read of my blog article about how to avoid Shopify putting your account on hold when you run preorders, and you’re all set.
However, if you're expecting to ship the pre-orders after 30 days* (which could lead to Shopify asking questions about your unfulfilled orders), or if you need to handle lots of pre-orders for your product launch, and want advanced features like the ones I mentioned at the start, then you'll probably want to look into a preorder app like ours, with the Built for Shopify status.
*A pre-order app would give you access to the "Scheduled" order status to indicate it's an official pre-order.

The most important thing for your pre-orders - transparency is everything.
If you're clear about timelines and proactively keep customers updated throughout the process, you'll create a great pre-order customer experience even with this manual approach.
That's it for Part 2! Feel free to reach out if you have questions about any of these methods, you can connect with me (Josiah) on LinkedIn, or send us an email at hello@shopside.com.au.
In our next blog article/video (Part 3), I'll do a demo of how to setup a Shopify Waitlist & Coming Soon Pre-order campaign through our Early Bird app, on the Free Plan.
